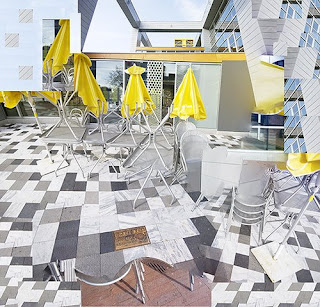
Repieced Multiples

This was done in Adobe Photoshop CS4. This can also be done in Photoshop 6, Photoshop 7 and probably Photoshop 4 and Photoshop 5. It can also be done in Photoshop CS, Photoshop CS2, and Photoshop CS3. It cannot be done in Aperture or Lightroom. It probably cannot be done in Photoshop Elements. I start by opening an edited tif file that is 16 bits and 300 dpi. I then go to the file menu and choose new. I choose a custom preset, choose the width and height that I want the final print to be, I chose a resolution of 300, color mode of RGB, a bit size of 16 bits, and background contents of white. If I know the paper I plan to use I enter it’s color profile otherwise I choose a color profile of Adobe RGB (1998). For Pixel Aspect Ratio I choose Square.
I go back to the first file and go to the Layer Menu and choose Flatten image since I use layers in most of my editing. I am careful NOT to save the image edited this way because I will be continually redoing edits on this file. I next crop a section of the image. I then click on the Move tool to drop a copy of this into the white new image. I then go back to the original image undo the crop, do a new crop and move that onto the new image. I continue this process with lots of variations. Each move is a layer and can be observed as controlled in the Layer menu. When the new image gets to 5GB or so I will flatten it and then do more editing rather than risk having an image that is difficult for the computer to process.
Text and photograph is ©2009 Paul Light. All rights are reserved.

0 Comments:
Post a Comment
<< Home