Basic Editing in Adobe Photoshop
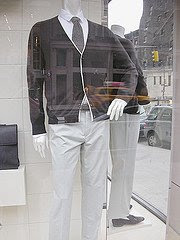
This is a photograph from a series of photographs that I started working on the first month I began photography in 1970. This particular photograph is of a store window on Madison Ave. in New York City. I have been photographing windows on Madison Ave. since the early 1970s. Over time I have expanded this series to other cities. Some of the other photographs in the window series can be seen at
http://www.lightwavephoto.com/plurb3.html
and
http://flickr.com/photos/paullight/sets/72157603591586110/
It began with a photograph shot on a rainy day. The camera was protected from the rain by an awning over the storefront. The camera used was a Nikon s7c. The ISO was set at Auto and Image Mode was set to High. The file was transferred to an Apple Macintosh computer for editing.
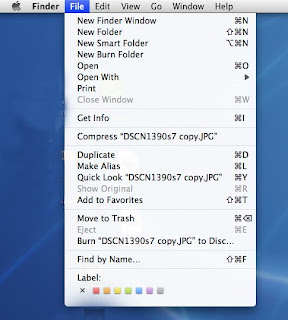
I began the editing process by placing the file on the desktop and duplicating the file. I duplicated it by clicking on the file. It appears highlighted. I then went to the File menu and chose the option Duplicate.
A second image appears on the Desktop with the same name and the word copy added to the original file name.
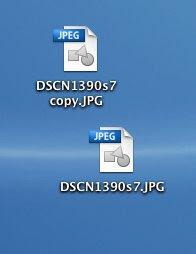
It is important to do the editing on the Desktop rather than opening the file from a CD or flash drive. Sometimes when editing is done on a CD or flash drive the file becomes corrupted.
I then went to the Edit menu to assign a profile
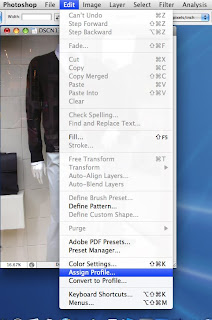
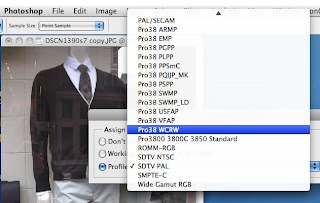
From the Assign Profile window I clicked on the radio button Profile. I then scrolled down the profile list using the navigation arrows on the right side of the Profile box and chose a profile to match the paper and printer that I use
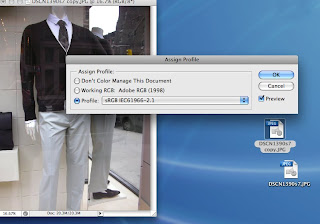
For this print I used Epson Watercolor Paper Radiant White and an Epson Stylus Pro 3800 printer. The profile code is Pro38WCRW.
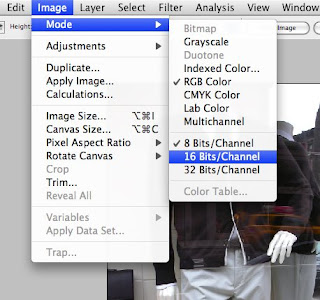
Next I open the duplicate file and go to the image menu and choose Mode. From the Mode submenu I change the file from 8 bits to 16 bits. This will give me more error room in the editing. This step probably isn’t necessary if your objective is to post a photograph to a website.
To edit any photograph in Photoshop, it is important to change the resolution to 300. This is done by going to the Image menu and choosing Image Size.
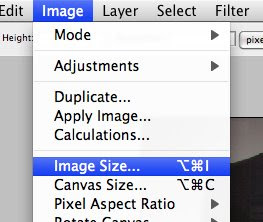
In the Image Size window look at the resolution box.
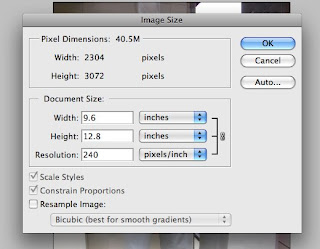
If the number it shows is less than 300 make sure that the Resample Image box is unchecked and then once it is unchecked change the resolution to 300.
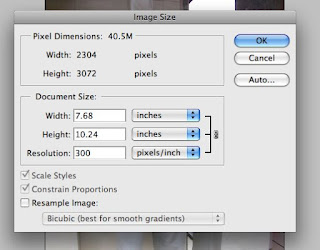
My camera actually defaults to 300 not 240. I have changed this for the example since many cameras default to a resolution less than 300. What you are doing by unchecking Resample Image is you are changing the height and width of the image with the resolution. This keeps the file size the same. If you accidentally make the file larger it will not print as clearly as it does when the file size is not changed.
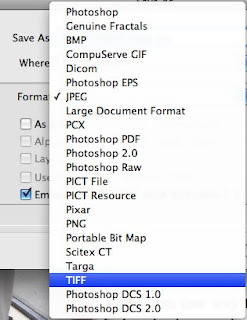
Next I convert the file to the TIFF format. This is a better format for printing than JPEG which has a more limited color range. Go to the File menu and choose Save As
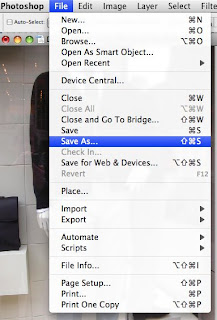
From the submenu I choose TIFF
I have stopped working on this post and will probably not complete it. I know some people have found this helpful as is so I will leave it up incomplete.
